Feeds:
Posts
Comments
webb's characters and scenes in aladdin or the wonderful lamp - coloured in

My scanner does dreadful things to colours.

Not everyone likes toy theatres, either full-size, or in miniature, so this is a bit of an unfair blog post for those who find them unbearable twiddly and annoying and are  hoping for something entirely Dolls’ House.

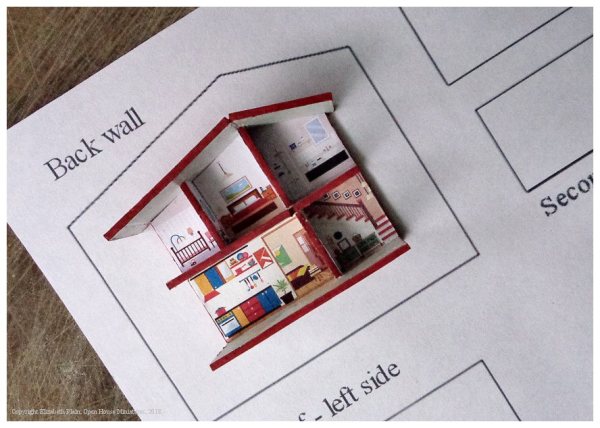
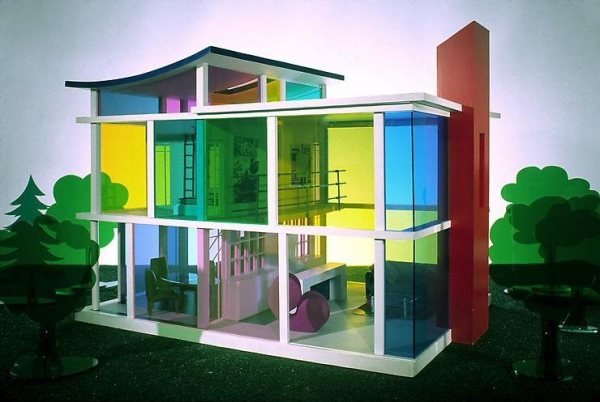
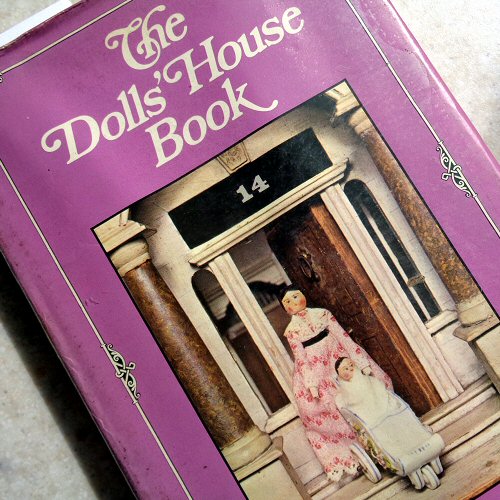
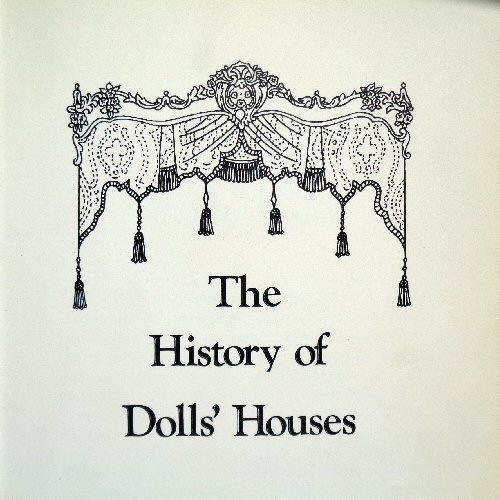
So, before I launch into Toy Theatre Land, I am going to inset a link here to a programme about dolls’ houses that I found fascinating and enjoyed enormously.

***   ***   ***

Now, about Toy Theatres –

They were not what I had planned for a Christmas blog post.

In fact I was wondering if I was going to write anything at all, or simply find some Christmas themed scraps to fill this space, when someone asked me if I would consider selling a pdf for the miniature Mathews Theatre set that I make.

I am going to leave out most of the story surrounding this – which is not at all interesting – and get to the point where I did some maths and worked out the cost of the original artwork,  my time spent water-colouring the theatre, scenery and figures (on nice paper), etc, etc, etc and came up with a fabulous sounding sum for producing a pdf.

Need I say that, naturally enough, I have not heard anything about a pdf since then. (I did warn the person who asked that making a toy theatre was a labour of love).

However, the person concerned did give me an idea and I hope that they read this and will be able to use some of the things here.

First I have to say that I am not an expert on toy theatres. I like them, but that is not the same as being an expert.

Most of the things that I know about them, I have learned from one book – Toy Theatres of the World, by Peter Baldwin.

photograph detail of a french theatre from peter baldwin's book - toy theatres of the world

Theatre Francais and a Jacobsen theatre from Toy Theatres of the World

photograph detail of a pollock's theatre from peter baldwin's book - toy theatres of the world

Pollock’s Theatre and Skelt’s new improved stage front from Toy Theatres of the World

The book is currently out of print, but if you can get a copy it will repay the effort of finding it. (They do turn up on eBay from time to time and there are a few on Amazon at the time of typing this.)

The book is slightly smaller than A4 in size and it is beautifully produced on glossy paper. There are 175 pages and and at least one illustration or photograph on almost every single page. It is informative without being hard to read or overladen with technical terms. I would dearly like to upload it here so that you can read it for yourselves: Peter Baldwin clearly loved toy theatres and it shows.

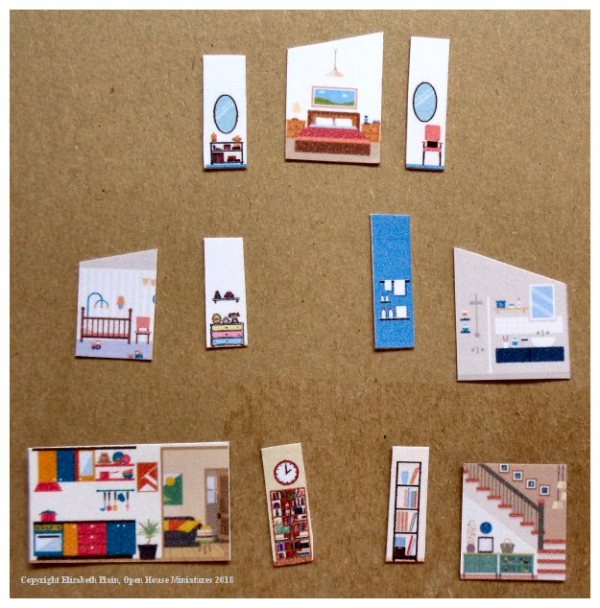
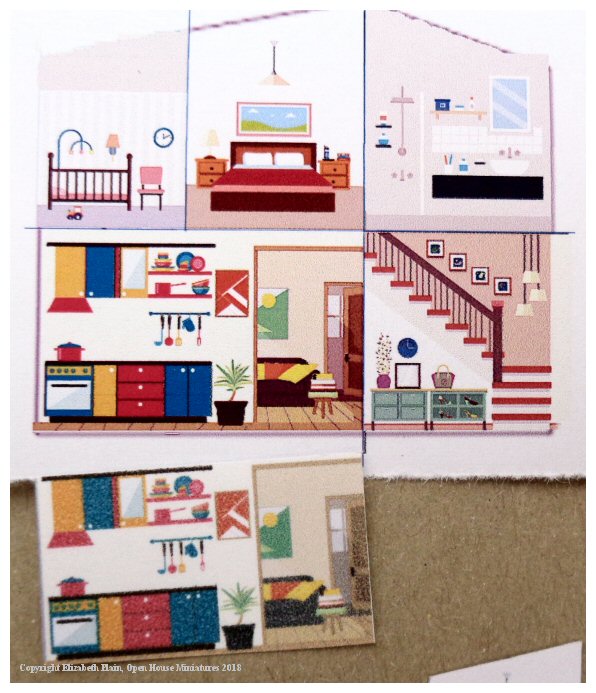
Having said that I don’t know much about them, I proceeded to draw a plan for a simple theatre, mainly so that I could demonstrate how a flat surface can give the illusion of depth by the way the lines lead inwards towards a central point.

I think that it shows that, if you would like to make your own unique theatre, it would not be too difficult to come up with something rather attractive and interesting.

drawing of a simple toy theatre front and curtain

My design (above) is very simple, but it is the basic type that was used for a great many of the original British toy theatres – a couple of which are shown below.

toy theatre - redington's new improved stage front - coloured in

This was later reissued as ‘Pollock’s New Improved Stage Front’

h c clarke - part sheet - toy theatre - not to scale

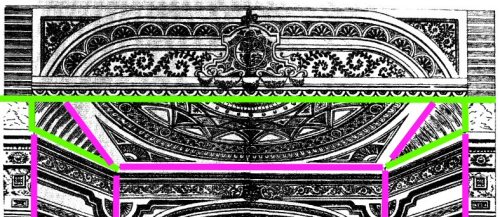
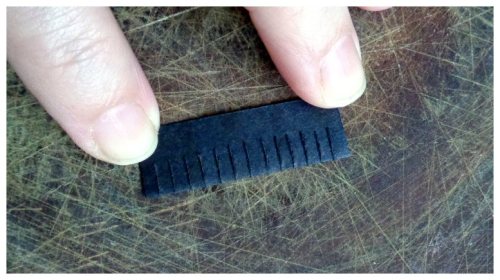
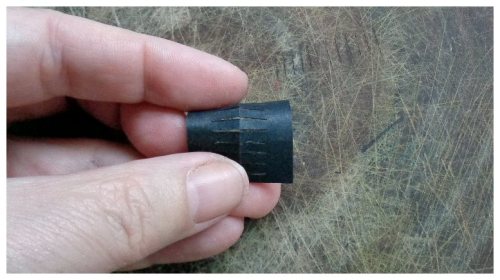
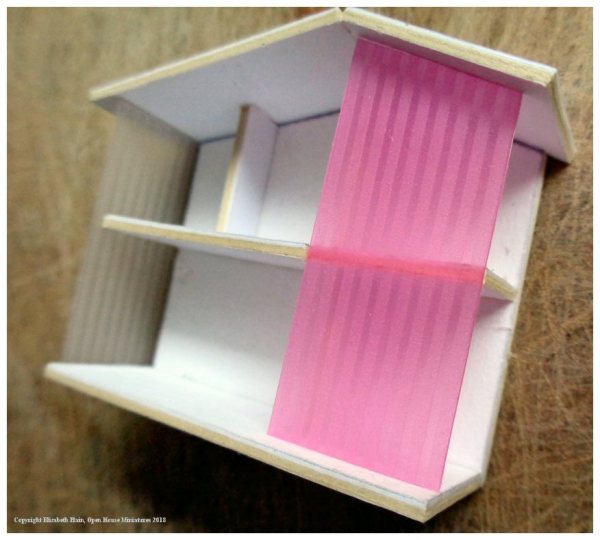
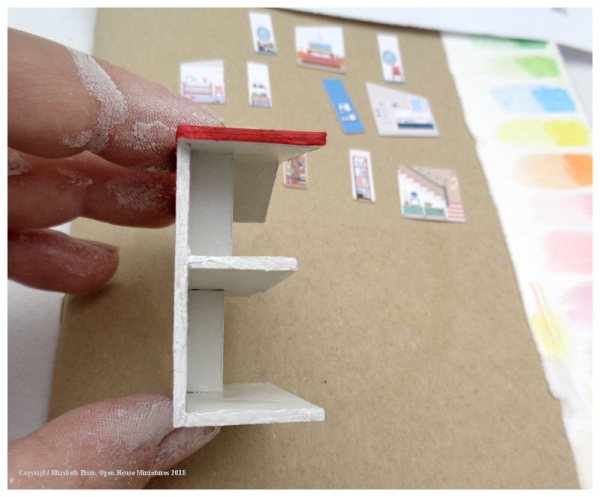
The trick for making the front of a toy theatre 3D, rather than flat, is a surprisingly simple one. Basically, looking at the picture below, you cut along the green lines, fold along the pink lines and then re-attach the uppermost part that has been cut away. The result is remarkably stable and durable when stuck to reasonably solid cardboard.

detail of how to cut and fold a toy theatre

The following are French and were produced by Pellerain, who made a great many high quality paper toys. I like this set of theatres particularly because they are so small and neat.

petits theatres - pellerain - french paper toy

Once you have found, or made, your own theatre you do, of course, need scenery, characters and a play.

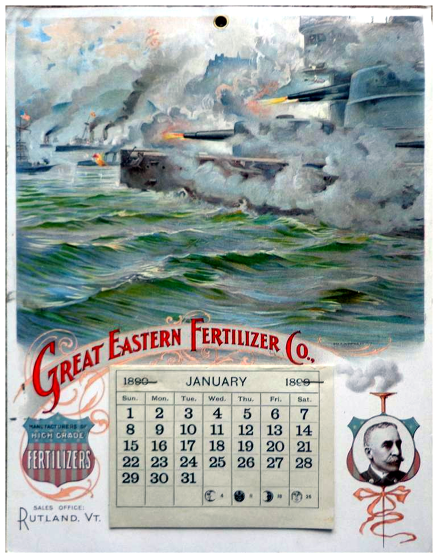
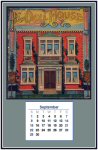
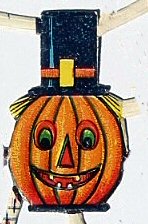
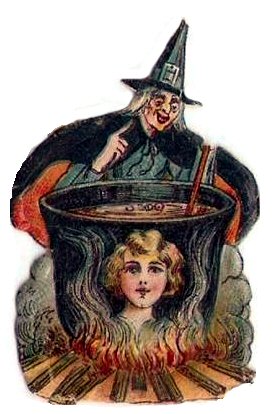
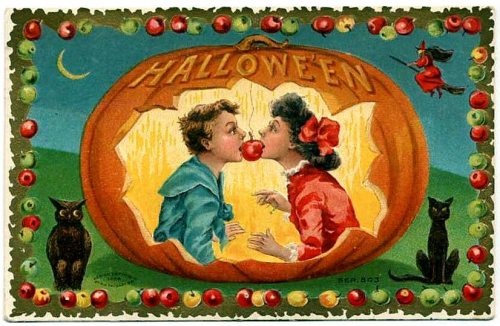
The following are scans of a set of Webb’s Aladdin – the picture at the top of this blog post is from this set.

pdf for full-size webb’s_characters_in_aladdin_black_and_white

pdf for full-size  webb’s_scenes_in_aladdin_black_and_white

pdf for full-size webb’s_juvenile_drama_aladdin_play_booklet

They are the original size and in the original black and white. You will need to colour them in (and resize them, if you would like a miniature set).

[Before anyone asks, I am not going to upload the characters and scenery in colour. The reason is that my scanner is not capable of doing a good quality colour scan, and no amount of trying to fix things on my part ever results in a good quality colour print from something I have scanned at home.]

For those of you wondering: Who was Webb ? and What about Pollock? I thought it was Pollock’s Toy Theatres ?!? … there used to be more than one seller of paper toy theatres.

pollock's business card from peter baldwin's book - toy theatres of the world

As I said before, I would like to upload Peter Baldwin’s book here, so that you can read about the history of these remarkable toys for yourselves, but I can’t. I have however, found a blog called Spitalfield’s Life  which has a long blog post where the various makers and sellers of toy theatres are explained in fairly clear detail. There are also some excellent illustrations and photographs, which are worth while seeing, at the bottom of the post.

If you would like to buy reprints of the plays,  I can thoroughly recommend the Toy Theatre Gallery. They have a wonderful, and growing collection of plays, some of them in colour, plus a few theatres.

Benjamin Pollock’s Toyshop, in Covent Garden, sells modern versions of some of the old toy theatres.

Pollock’s Toy Museum, in Scala Street, has an amazing collection of all sorts of toys, but no on-line sales outlet. You will need to visit to see what they have in their shop and I urge you to go. It is a magical place.

[By the way, the two ‘Pollock’s’ are entirely separate businesses. The Scala Street Pollock’s came first.]

I have found that the Victoria and Albert Museum’s collection of toy theatres is either aggravatingly scanty and / or difficult to locate on-line, but they do have a  download for a version of Pollock’s Cinderella

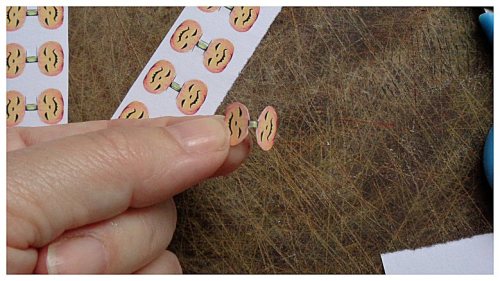
If you make your own characters, colour them in and so forth, you might like to try something that used to be called ‘tinselling’, where metallic shapes were stuck to black and white prints that had been hand coloured.

tinsel picture - mr elton as sir kenneth of scotland

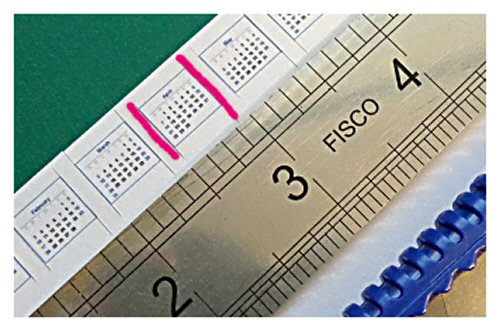
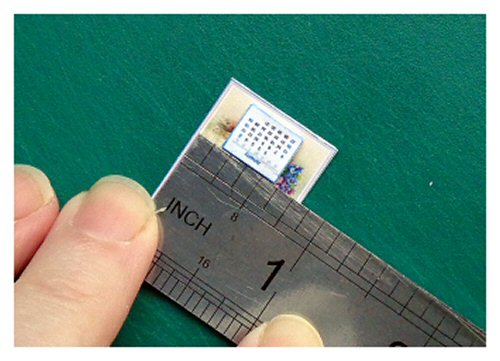
In the picture below (which is a great deal smaller than a print used for tinselling would have been) I have used gold and silver paint and various sorts of glitter.

detail - miniature tinsel picture

Finally…

I was enormously pleased to find the following short films available on line (and free to watch):

Firstly, The British Film Institute has a short (3 minute) film  which shows Benjamin Pollock demonstrating printing and painting scenery and then assembling a toy theatre in his shop.

benjamin pollock assembling a toy theatre in his shop - 1928

The film was made in 1928 and so it is silent, but the picture are remarkably clear and crisp.

benjamin pollock and his daughter operating a toy theatre - 1928 - gaumont mirror film

[Note: toy theatres came in various sizes and this is a large one.]

Then, British Pathe News have two films:

There is an old very short film, without sound, about Pollock’s theatres here

british pathe news - pollock's theatre

And there is an old very short film, without sound, about Tinsel Pictures here

british pathe news - mr webb - tinsel pictures

Now I am going to sit here and think about the Christmassy scraps that I have been meaning to share.

There really are never enough hours in the day.


open house miniatures dolls house calendar 2019

This type of calendar is old-fashioned but I like them a great deal.

Generally speaking, the examples that have survived seem to be the ones that were produced for advertising purposes.

great eastern fertilizer co calender 1890

If you would like to make a miniature calendar, of this type, there are a variety of pictures backs to choose from at the end of this blog post. There is also a set of calendar pages for 2019. The calendar pages do not have 2019 written anywhere on them, but the days and dates are correct for next year.

Keep scrolling down if you just want to make one.

I am going to add a few tips here because, although these are ‘easy’ to make that doesn’t mean they aren’t a bit tricky in places.

I used coated ink-jet printer paper to print the picture, varnished this with water based varnish. I let this dry thoroughly.

I then glued the picture to some thickish card-stock and then I had to wait while it dried flat. I put it under a heavy book and this slowed down the drying process. (Waiting for things to dry is something that I find difficult, but it is important.)

Then I made a (largish) hole with a small hole punch, so that the finished calendar could be hung up on a pin. (Huge pin in the photo. I wanted to do this, you don’t have to.)

Then I cut round the calendar, using a sharp craft knife. (It is important to use a ruler and a sharp knife if you want straight, un-torn edges.)

I printed the calendar pages on the thinnest paper that I could find (75 gsm) and, when they were dry, I cut them out.

The pages are small and there is a trick to cutting them out so that they look reasonably square and straight-edged: cut the short sides first.

(Cut inside the blue lines, if you don’t want the lines to show. I like the blue lines – you may not.)

open house miniature calendar pages 2019 - cutting short sides

Then cut the long edges all in one go.

open house miniature calendar pages 2019 - cutting long sides

and hopefully, you should end up with neat calendar pages…

open house miniature calendar pages 2019 - finished pages

…which can then be glued together, along the top edge.

open house miniature calendar pages 2019 - clipped for gluing

I gathered the calendar pages together and held the bottom edge in a clip. Then I applied a tiny amount of white wood-working glue to the top edge with a paintbrush and pressed the edges together with my fingers.

This then had to dry, which seemed to take ages.

The calendar back has a single calendar page printed on it. This should (hopefully) make sticking the pages to the back relatively simple.

NOTE: because I had varnished the picture, I needed to score a few lines into the surface of the calendar back in order to get the block of calendar pages to stick to it.

If you have trouble getting the pages to look level – and in real life they are very often not level – line a ruler up with a side edge and slide the calendar pages about, until you have them where you want them. Like this:

open-house-miniatures-assembling-miniature-calendar


The paper that you use and your printer will make a huge difference to the finished look of the calendar. So experiment and use the things that you like.

***   ***   ***

The only way to make (reasonably) certain that a download will print to the correct size is to make a pdf.

For this blog post, I also made thumbnail size images. These are so that you can have an idea of what the various calendars look like.

Please click on a picture to open the matching pdf and then print from that: the thumbnails will be poor quality and will probably not be the right size for the calendar pages.

Miniature Calendar Back - January  January

Miniature Calendar Back - February February

Dolls House Calendar Back - March March

Dollshouse Calendar Back - April April

12th scale Calendar Back - May May

Miniature Calendar Back - June June

Dollhouse Calendar Back - July July

Miniature Calendar Back - August August

Miniature Calendar Back - August #2 August #2

Miniature Calendar Back - September September

Miniature Calendar Back - October October

Miniature Calendar Back - November November

Miniature Calendar Back - December December

Miniature Calendar Back - December #2 December #2

There are two calendar backs for August and December because I made these over several days and lost count of what I had done.

All the individual calendar pages are in the pdf below.

OHM_2019_calendar_pages

Finally, on an historical note – the pictures are from various sources and none of them is a reproduction of an antique calendar. I made the calendar pages using Microsoft Word.

***   ***   ***

If you are a regular reader of this blog you will know what I am about to say about adverts which you may see here: WordPress puts them there from time to time, they aren’t mine. 😀

Open House Miniatures - dolls house Halloween pumpkin head, lanterns and bat garland

The lens on my camera – a Sony cybershot – bends pictures at the edges. I have to crop to the centre of the image in order to have an un-distorted picture : )

I very rarely make anything specifically, in miniature, for Hallowe’en, but this year I tried out an old recipe for papier mache and made a Jack o’ lantern that can be illuminated.

dollhouse light up jack o' lantern

In this photo, the head is sitting on a book light.

For this sort of papier mache you dissolve paper in a glue solution and use the resulting gloop as modelling medium. As the mixture is predominantly water, it tends to shrink dramatically as it dries and I ended up with a rather wrinkled looking head. Maybe it has been alight all night, or possibly it is a warty squash rather than a pumpkin.

The glue traditionally used for this type of papier mache was wallpaper paste. I read somewhere, at some point, that wallpaper paste was, at one time, made from flakes of potato starch. Whatever it is made from today, it usually also contains at least one fungicide and all the brands that I looked at carried warnings about not getting it on your skin. This being so, please read the instructions on your packet of wallpaper paste if you decide to try out the following mix :-

  • 1 part water (I used 1 desert spoon)
  • 1 part paste (I used 1 desert spoon)
  • sufficient moistened paper to beat into a thick paste (I used toilet paper; this is designed specifically to fall apart in water and using it reduces the amount of beating required.)

Because of the way it shrinks as it dries, I am not sure that the resulting mix is suitable for fine modelling but I think it would make an excellent, light-weight surface for a roughly finished wall.

If you would like to make a hollow pumpkin head of your own, air drying clay or fimo might be a better option.

I made mine around a ball of paper handkerchief, covered in cling film and supported on a stick. If I had thought to use a piece of dark coloured tissue paper, around the paper handkerchief ball, it would have made seeing what I was doing, while I was making the face, a great deal easier.

papier mache pumpkin head moulded around a ball of tissue, covered in cling film

When the head was dry, I removed the stick and pulled out the paper handkerchief and cling film.

I think that the papier mache recipe is from a book called ‘The Toymaker’. I did write down that the book was published in 1882 and that the mix was originally used for making a mask. But I don’t have a copy of this book and only wrote down some of the things that I wanted to try out.

While looking for a copy of ‘The Toymaker’ on-line (I am ever hopeful) I did come across a rather nice site called ‘The Toymaker’. On it there are a great many paper based projects to download for free. The owner of the site, Marilyn Scott Walters, is an author and has several books of paper toys on Amazon. I think her work is inventive and great fun – and so well designed that much of it could be reduced in size and made in miniature. Here is just one example :-

marylin scott thomas - the toymaker- fairy market - to make

*   *   *

Making the supposed-to-be-a-pumpkin head reminded me of these.

miniature paper lanterns in various colours

I know these as ‘Chinese Lanterns’ and they have been made, in one form or another, for many years.  They are certainly not my own invention. I think they are fun to make full-size, in pretty papers, for birthday and Christmas decorations. Ideally I would have liked to make these miniature ones in brightly coloured origami paper. This is beautifully thin and holds its shape well but I didn’t have any, so instead I coloured some thin (75 gsm) printer paper coloured with indelible ink pens.

If you decide to make these and colour paper in this way too, please put something under the paper that you are using as spirit-based inks tend to go straight though thin paper and they will stain the surface underneath.

NB If you use an ordinary felt pen the ink will, in my experience, run when it comes into contact with glue – any sort of glue.

In this case I used ASDA own brand pens, but you can only buy these in-store. For nice colours, including a range of neon, Sharpie pens are possibly my favourite craft pen available on-line at the moment.

when using an indelible marker, put scrap cardboard under thin paper

This is how I made the lanterns:

First I cut an inner piece of paper to make the central cylinder. The example in the photograph is tissue paper. The gold flecks glint nicely in real life but do not show up at all in my photographs of the finished lanterns. I wrapped this paper around a 10 mm (plastic) knitting needle and glued it together with water based glue.

making a miniature lantern - tissue paper around a knitting needle

10 mm knitting needles are approximately old style 000 in the UK, or size 15 in the US.

The paper will shrink as it dries, so it is important not to wrap the paper too tightly around the knitting needle. If you do, you may have trouble getting the completed lantern off the needle.

Next I cut a piece of paper a little bit bigger than the inner paper, folded it in half lengthwise and made a series of cuts, along the entire length, at right angles to the folded edge.making a dolls' house miniature lantern - cutting slits in the paper

When this is unfolded the shape of the lantern began to emerge.

making a miniature lantern - unfolding the paper

Next, I glued one long, outer edge to the top edge of the inner cylinder.

making a miniature lantern - gluing the top edge in place

Then, when this was dry, I pushed up the other edge, applied glue to the edge of the inner cylinder and then lowered the outer casing into place.

making a miniature paper lantern - easing up the outer paper

While this is drying, I cut a strip of paper for the handle.

making a miniature paper lantern - fixing the handle in place

Then I glued this in place, slid the lantern off the knitting needle, and fixed the other end of the handle in place with another dab of glue.

The smaller lanterns are made by exactly the same method, but around a pencil instead of a knitting needle.

The width of the paper, and the size of the cuts made in it, affect the overall appearance of the lantern a great deal. The two sizes that I made are in the following pdf –

OHM_181005_chinese lantern

*   *   *

Having found my ink pens and having them to hand, I thought I would experiment with an idea that I had for a garland of bats.

The idea was to make a 3D bat. It was an interesting idea, but I don’t think that I succeeded in making a particularly good bat shape and, in an effort to make the bats look more 3D, I ended up adding some flat pumpkin heads to the garland.

First I printed the bat shape on the thin printer paper that I had used for the lanterns.

They are rather small, so I cut them out roughly and scored the fold lines. Then, to make the folding easier, I cut away some of the paper and folded the bat shape.

I then flattened them out again, finished cutting round the outline and coloured them black – with an indelible marker pen.

miniature bat shape

I used black cotton for the string of the garland. The cotton wanted to curl and twist when it came off the spool, so I dampened it and lay it on a formica counter top to dry straight and flat.

doll house miniature bat garland on a cotton thread

I glued the bat shapes to the cotton with a dab of white wood working glue. This will peel off the formica, leaving the bat shape stuck to the cotton thread.

While the glue was drying I cut out some small pumpkin heads and then…

miniature pumpkin heads for a dollshouse garland

…used these to fill in the gaps between the bats.

bat and pumpkin head dolls' house garland

The pdf for the small pumpkin heads that I used in the garland is here: – OHM151102_halloween_pumpkin_heads

The pdf for the small bats is here: – OHM181004 _mini_bats

*   *   *

Now for some things that are just printable 😀

Creative Beacon have some useful looking bat shapes (for free). I would have used these, if I had found them before embarking on my own bat design  : –
creative beacon - bat shapes for hallowe'en

My own collection of Hallowe’en related images is paltry, but here they are: –

Halloween jack o lantern pumpkin headHalloween jack o lantern pumpkin headHalloween jack o lantern pumpkin headHalloween jack o lantern pumpkin headHalloween jack o lantern pumpkin headHalloween jack o lantern pumpkin headHalloween jack o lantern pumpkin head

Halloween witch head profile

halloween house - microsoft clipartHalloween - witch on broomstickHalloween witch and cauldronHalloween witch and cauldronHalloween - old lady and catHalloween - old lady and cat

Halloween - black catHalloween - black cats

Halloween - crescent moon catHalloween - crescent moon owlHalloween - crescent moon witch

Halloween - card - pumpkin and couple with appleHalloween card - old lady and cat

Halloween - young girl and pumpkin head

How you spell Halloween seems to depend on how old you are and where you were born. I think that Halloween should be spelt (and not spelled) Hallowe’en, which apparently makes me very old and British. (Any pun making is usually unintentional: this time it was irresistible.)

Part of a card - Dolly Dingle doll with witch's costume for Halloween

Finally, time is running out on the Giveaway in the previous post so, if you would like the chance to win a miniature nativity set, please don’t delay entering.

The giveaway ends 22nd October 2018, at midnight, UK time.

[Regular readers probably know by now what I am going to say about any adverts at the bottom of this post – they aren’t put there by me: WordPress needs to fund its blogging service. I could pay a small fee to have them removed, but have chosen not to do this.]

dollhouse miniature nativity set

Wooden base, hand-painted plastic figures. SIZE – Just over 1 inch in height (approximately 2.5cm), Just under 1 inch wide (approximately 2.3 cm), Just over 1/2 inch deep (1.3 cm)

I would like to hold a Giveaway for one of my nativity sets.

From what I have read, the usual purpose of a Giveaway is to promote a product or service, so I had better say here and now that I am not trying to promote sales of these nativity sets. This is intended as a bit of fun for readers of this blog and not as an excuse for viral networking.

It also seems usual to ask giveaway entrants to perform tasks. There are no complicated tasks in this giveaway.

If you would like to, and only if you would like to, please leave a comment at the bottom of this blog post, with a link to a site about miniatures that you like. A site that you would like to share with other people.

Just a link and a few words will do. For example: Phoenix Model Developments and Warwick Miniatures – amazingly detailed 12th and 24th scale cast metal models:
https://www.phoenixmodeldevelopments.com/index.html

[Incidentally, at the time of typing this, Phoenix are holding a sale  of some of their model toys.]

The comment can be in any language, but I would like the link to be to a dolls’ house or miniatures site that is publicly accessible. For example: a forum, where you need to be a member in order to participate, isn’t accessible to non-members.

Important: you will need to enter the giveaway through the Rafflecopter form below, just leaving a comment will not automatically enter you in the draw.

The entry form is here:

Giveaway Entry Form For a Miniature Nativity Set

[UPDATE: 22nd October 2018 – the winner is Kate H in Canada.]

In order to be entered into the draw (and prove that you are not a robot) you will need to type either YES or NO in answer to the question: ‘Did you leave a comment?’

The Giveaway is set to run from 12 am, 28th September 2018 to 12 am, 22nd October 2018 (UK time). The winner will be randomly selected by Rafflecopter and, as I said before, you don’t need to leave a comment and a link in order to enter the draw.

The purpose of this giveaway is not to collect comments for this blog so, if you leave one, please don’t worry when you don’t see it appear immediately.

If I receive a reasonable number of links (more than ten) I plan to have a ‘Recommended by Readers’ list somewhere. Maybe as a static page – but I haven’t decided about this yet.

Rafflecopter will ask you for your email address, or to sign in with your Facebook account (if you have one).

I will contact the winner, by email, and arrange for the nativity set to be posted after the draw has taken place.

Neither I, nor Rafflecopter, will pass on your email / Facebook details.

I have never entered a Giveaway myself so, before I wrote this blog post, I did a very small amount of research and found this Youtube video, which explains how the Rafflecopter giveaways are supposed to work.

*   *   *

Why do I want to make a ‘Recommended by Readers’ list of links to dolls’ house and miniatures sites?

Well, I had been considering repeating the format of a previous blog post, where I had shared my Christmas Holiday Reading List. But when I looked at the referral information provided by WordPress for this year there was (overwhelmingly) :

  • Pinterest (these cushions were top of the Pinterest links list)
  • Papermau (a site with an astonishing number and variety of paper models)
  • A very wide variety of Dolls’ House Miniature Forums where, invariably, you need to be a member in order to see anything at all.

And from this it was clear to me that the idea wouldn’t work so well this time round.

And then I thought… There are lots of websites / blogs about miniatures. There must be many people who have a dolls’ house / miniatures site that they like. Why not ask the people who read this to share their favourite? That would make interesting reading.

And then the idea of a Giveaway was added into the mix.

Anyway, to bring what was intended to be a short blog post to an end: I was going to save the giveaway until December and call it: ‘A Christmas Giveaway’. But then I thought, if I do that then it will have to end at Christmas, or close to Christmas, and the winner won’t receive their nativity set in time for Christmas.

Hence the rather odd sounding ‘End of Year Giveaway’.

*   *   *

Finally, if you see an advert here, at the end of the blog post, it isn’t mine. WordPress sometimes run advertisements because they need to fund their blogging service. I could pay to have the adverts removed, but I would rather host a Giveaway and pay postage to have a gift delivered.

The ‘E’ House

The 'E' House completed - and outsize house plan

I am going to count this house as one of my notable failures.

The most glaring fault is the room divider between the kitchen and the hall. It isn’t wide enough to hold the full length of the ground floor securely. It is all right if you don’t wiggle the ground floor, but someone is almost certainly going to be tempted to do this at some point.

Added to which, I don’t like dolls’ houses with walls that are covered in pictures of furniture. (This is very narrow-minded of me.)

All in all it is an idea that needs more work than I have time to give it (at the moment).

That said, I still think that it was a fun idea. So if you would like to try making The ‘E’ House for yourself, the plans are at the end of this blog entry. There are also a list of the materials that I used and basic written instructions (sorry, no slideshow this time).

If you would like to know how I struggled with an idea that did not turn out as I hoped, read on (and avoid the pitfalls that I fell in to):

The Idea was:

  • A bright, modern dolls’ house
  • Slender so that could hang on a wall
  • With something ‘different’ about it

I ended up with this design:

The 'E' House - basic structure

– which is not what I call exciting, innovative or even encouraging – even though I daringly off-set the wall dividers.

With a nod to the distinctive, exciting and innovative house designed by Laurie Simmons and Peter Wheelwright for Bozart

The Kaleidescope House - conceived and designed by Laurie Simmons and architect Peter Wheelwright.

I had wondered about incorporating some plastic panels (the plastic came from the covers of a couple of ring binders)

The 'E' House - plastic panels

The second floor has an indent to accommodate the panel

– but looking at the panels, once they were in place, I wanted them to move – either to slide or to swing open and this would have meant framing the panels so that they could be hinged effectively.

So I abandoned the plastic panels – which I still think were a good idea – and decided to have an open plan house.

But what was I going to do with the inside?

I did try some tiny print wallpapers but, because you can see the whole house in a glance, they had to be very nearly identical or they clashed – horribly.

I must have been fairly desperate at this point because I considered a tried and trusted decorative style, which I truly dislike.

The 'E' House - interior papers (on card)

This is what I ended up with. Don’t ask how long it took. Just don’t.

I dislike ‘furniture wallpaper’ (as I call it) so much that I despaired and decided to try paint, and spray-painted the house with fast drying, spirit-based paint. It was supposed to be white paint, but it turned out to be cream, and it brought out the ‘grain’ of the cut edges. (This is avoidable; I had been lazy and hadn’t sealed the edges before painting).

The 'E' House - spray painted

I spray paint out of doors, in a box lined with removable paper. As a change from my usual problem with rain, it was so hot that the paint was almost dry as soon as it left the can.

Maybe more COLOUR was the answer ?!

The 'E' House - side view - painted roof

It was at this point, and feeling rather grim, that I decided to call this The ‘E’ House (‘E’ for Everlasting, not Elizabeth) and throw it away before I wasted any more time on it. Needless to say: I failed to throw it away.

The following day, the tricky manoeuvre of fitting the decorative papers into the house – which was already firmly glued together – was accomplished.

After which I really would have been happy to throw house away and never try to make anything like it ever again. Ever.

Luckily, shortly after this, a surprise visitor turned up and the house found a new home elsewhere – thank goodness !

The 'E' House - and new owner

Finished size:

Height: 1 and 3/4 inches (4.4 cm)

Width: just under 2 inches (5 cm)

Depth: just over 3/4 of an inch (2 cm)

Materials:

pdf of the house plans – OHM_201809_’E’_House-plans

pdf of the interior decoration – OHM_201809_’E’_House-interior

  • Basic home printer
  • Mountboard (I used A4 Daler Rowney from Amazon)
    I think it is called ‘Matboard’ or ‘Mounting Board’ in the United States
  • Laminated printer paper (like this)
  • Basic printer paper
  • A very sharp knife (I use a craft knife with a blade that snaps off – like this)
  • A metal ruler
  • A solid surface on which to cut the mountboard
  • White wood-working glue (I used Evostick)
  • A small paintbrush
  • Paint (of your choice – I would avoid watercolour paint because it fades relatively quickly)
  • Varnish (of your choice)
  • I do not recommend using a hairdryer or heat gun to speed up the drying process. In my experience, the intense heat from both of these tends to warp the mountboard

Please remember that the materials that you use will affect the look of the house. For example: laminated printer paper gives a much crisper look than even good quality card (see below) and the thickness of card / board used will affect the overall appearance considerably.

The 'E' House - difference in printing results

What I suggest doing:

Print the decorative papers on the laminated printer paper and set them aside to dry

The 'E' House - wall panels

Print the house plan on basic printer paper

Stick the basic paper to the mountboard
Let this dry completely (under a book or other heavy weight to keep it flat, if necessary)

Cut out the house pieces carefully – it is up to you whether you would like an indented second floor or not

Check that the floors and back wall match in length exactly

Measure the width of the dividing walls and cut strips of mountboard of the required width

Seal all the cut edges of the mountboard with a thin layer of glue (this should give you a better finish that my spray painted effort)
Let the glue dry completely

Paint the mountboard with paint of your choice – top tip: don’t use very watery paint. If you do it will un-stick the glue and make the mount-board swell up
Let the paint dry completely

Glue the Ground Floor to the bottom edge of the Back Wall.

The 'E' House - back view

The roof sits on top of the back wall and the ground floor is in front of the back wall.
Always let the glue dry completely

Glue the decorative paper for the back of the rooms to the back of the house – you will probably need to trim the kitchen and hall floor, so that it looks ‘right’

Alternatively, you can glue each room down individually.
Let this dry completely

While it is drying, glue the decorative panels to the strips of mountboard that you have cut. The panels do not have to be cut to an exact height at this point, but they do have to have the ‘correct’ panels in place e.g. nursery/ bedroom, bedroom / bathroom, kitchen / hall.
Let these dry completely

Then cut the kitchen / hall room divider so that it fits the space between the Ground Floor and the Second Floor and glue it in place
Let it dry completely

Glue the second floor into place
Let it dry completely

Cut the remaining room dividers so that they reach ceiling height – cut the top at the angle of the roof if you wish – and glue them in place
Let them dry completely

Glue the roof in place. I didn’t cut angles for the apex of the roof. Angled joints seem to be out of fashion of at the moment, so I simply left a small gully.
NB Working with the back of the house on a flat surface will make it easier to get a neat join at the back
Let the glue dry completely

Repaint the roof and the back of the house. Re-touch any other paint work that needs it.

(optional) When the paint is dry, seal the surfaces with a varnish of your choice – the varnish used for finishing does depend on what paint you have used. I used a mixture of acrylic paints for the red. The off-white colour was fast-drying spray paint. The spray paint was a bad choice because it raised the grain on the cut edges of the board, but it does have a nice shiny finish on the surface of the mountboard

*  *   *

Finally:

As with all the projects that are freely available on this blog: Please don’t sell the plans for this house, or the interior decoration.

If you would like to sell the house that you make, please think about the ground floor and find a way to make it more stable : )

If you decide to make a replica / tribute to the Bozart Kaleidoscope House in miniature, a credit to the designers would be appreciated:

http://www.lauriesimmons.net/projects/kaleidoscope-house

*  *   *

About the adverts:

WordPress sometimes places advertisments on the blogs that they host: they need the money to keep WordPress on-line.

By paying a small amount of money I could have these advertisements removed. I choose not to do this – I need every penny for paint, and glue, and card, and paper, and wood, and all sorts of other things too.


Kristin Baybars

Kristin Baybars - name detail

Two blog posts in a week! What is going on? I haven’t blogged in ages because I have no ‘blogging time’ to spare. But I think this is important and so some other things have had to wait.

Charlotte Stokoe, organiser of the London Dolls’ House Festival (producer) and Fred Burns (director) have made a film called A Pathway of Crumbs. (see previous blog post) about Kristin Baybars, who is the owner of a very special, almost indescribable shop / toy collection in Gospel Oak, London.

I have watched  A Pathway of Crumbs several times now. And, interesting though it is, I have yet to catch more than the faintest flavour of the person whose life and work it is supposed to document. This bothers me because I think that Kristin’s life and work are worth documenting – fully and properly.

It is quite possible that the qualities that make Kristin Kristin are impossible to capture on film. I am certain that I could not do it, not least because I would have to learn all the technical skills necessary in order to make the attempt.

I did try to write down what I thought about her and ended up with a nebulous list of qualities, rather than actions with dates attached to them. So here, for what it is worth, are some of the things that I think are most important – I have left out more that you can imagine, if I hadn’t I would have been writing for years.

Creativity – throughout her life Kristin has made things. She understands, from the inside out, about making things. She created the Ostrobogulous toy range.

Those of you who watched Play School on the BBC as a child will recognise Humpty and Jemima – well, Humpty was designed by Kristin.

And now there are miniature Humptys at Kristin’s (although these were not made by Kristin, herself.)

Kristin Baybars - miniature humptys

When I first knew Kristin, she had just been asked to make, among other things a  number of miniature cricket bats and tennis racquets to go in sports themed presentation cases. A little later on, and over a number of years, she made a series of tiny wooden jig-saw puzzles. What I find truly remarkable is that she found (and still finds) the time and enthusiasm to encourage other people to make things too.

Dedication – if you are not a shop keeper you will have to exercise your imagination for this… It Is Hard Work… Never Ending Hard Work…You Have to Find the Stock…

Kristin Baybars - dolls house detail

If your stock is unusual and not to be found in a warehouse this is: Even More Hard Work…

Kristin Baybars - wooden mechanical toy camel

Then you have to unpack your stock, clear away the packing, price the stock, arrange it,

Kristin Baybars - miniature clothes hanging up

look after it,

kristin baybars - philip beglan doll painting a pillar box

allow people to buy the things you love, re-order (when possible) what you have sold,

Kristin Baybars - dollhouse interior detail - kitchen table

and that is just for starters.

Now consider the sort of things that are in Kristin’s shop:  toys that are not stocked in most shops because they are not a standard, packaged-in-plastic size,

Kristin Baybars - toy ship and fish

unique things,

Kristin Baybars - seen through shelves of toys

delicate miniatures…

Kristin Baybars - miniature mechanical toys

If Kristin was not utterly and completely dedicated to what she does she could not have done it at all, let alone continue to do it for years and years and years.

Kristin Baybars - dollshouse interior

‘Fauvist Inspiration’ –

fauvism - kristin baybars shop front

I am not trying to say that Kristin’s shop (particularly the front) is Fauvist, but I would never have looked at a Fauvist painting ‘properly’ if I hadn’t seen Kristin’s shop front. And now Fauvist paintings, with their unexpected colours, are a great joy to me. Kristin and her shop have this effect on me: they are make me look at things afresh. They expand my mental horizons.

Helpful Advice – it would be impossible for me to relate all the advice that Kristin has given me over the years, there is so much of it. One of the earliest pieces has stuck with me though. It sounds quite simple and yet it is vital: ‘Babies eyes are in the middle of their faces.’

Elizabeth Plain - miniature baby dolls

Try making a doll, which is I was doing when Kristin told me this, and see how important it is to get the position of the eyes exactly right.

Imagination –

Kristin Baybars - facebook - the ghost of marie antoinette sets up a cake shop

‘The ghost of Marie Antoinette has set up a cake shop at Kristin Baybars’

When I saw this it set me thinking: What sort of cake shop would Marie Antoinette have? Would she have a very flouncy apron? Would she have to wear one of those bakery caps? Do ghosts have the same rules and regulations that we seem to have? I wonder what the court painter would have made of her and her cakes?  Would he have to be a ghost too, or maybe he would be a very brave (or scared) mortal.

I am going to stop now, before I drift off into a dissertation about the French Revolution, interwoven with remarks about some Louis XVI sugar decoration moulds that I once saw. This is what Kristin and her shop have always done for me: fired my imagination, allowed me to think, to ask questions, to have ideas.

In conclusion, I know that this small, vividly coloured, crowded shop, ‘in the middle of nowhere’ is not going to be to everyone’s taste. But if it suits you, you will love it.

Please go there before it vanishes. It is unique and you will not see its like again.

Kristin Baybars, 7 Mansfield Road, Gospel Oak, London, NW3 2JD

Telephone: 020 7267 0934

Facebook: www.facebook.com/Kristin-Baybars

Usual opening hours Tuesday to Saturday, 12 noon to 5pm.

Please check this information before visiting – it may be out of date by the time you read this.

Kristin Baybars - film still - detail of front door

A Pathway of Crumbs - a film about the life and work of Kristin Baybars

I have a dilemma (again). You may have noticed that I get them now and then.

A friend has just sent me a copy of a short film about the life and work of Kristin Baybars, owner of possibly the most amazing shop that most people have never heard of.

The film is Called A Pathway of Crumbs and I had four main reactions when I watched it.

1. my personal reaction:  What can I do to help save Kristin’s shop ?

2. the miniaturist reaction: Why are the amazing jig-saws that Kristin used to make not mentioned ? And what about the beautiful, tiny, wooden ark that she made ? What happened to the huge the dolls’ house that she made when she was at school ?

3. personal reaction again: I can’t comment on the technical side of this, but I am going to stop the film so that I can look at David Ward’s work. Ten Thousand Curses, I Was Looking at That… Thank Heaven for the Pause Button… etc.

4. personal reaction yet again: This is not ‘easy’ viewing in places. One of Kristin’s friends, Janet, contracted meningitis and, in order to save her life, had to have what is euphemistically termed ‘life changing surgery’. Kristin, herself, is growing old. This is real life, not a pretty advert for a unique shop.

I hope you can now understand why I felt that I had a dilemma. I haven’t been asked to review this DVD, yet I found it evocative and emotive and think that it is worth seeing. I think it will interest people and yet I hesitate to recommend it because it is not ‘pretty’ and does not fit in with the generally cosy image of the dolls’ house world. My perception of the dolls’ house world being  that, for a great many people, for a great deal of the time, it is a haven and an escape from the cares of the ‘real’ world. And a good and necessary addition to the ‘real’ world too because, would you like to live without your imagination?: I wouldn’t.

The online-trailer, although brief, is (I think) wonderful.

It is possible to watch the whole film on-line – on Vimeo – at a very reasonable £3.99 to hire (48 hour access), or £6.99 to download and watch at any time.

The DVD is also available to buy from The London Dolls’ House Festival – payment details are at the bottom of the page.

*   *   *

The following short films, also about Kristin Baybars, are charming and free to watch online:

David Ward miniature cat in Kristin Baybars dollhouseLondon Film School – KRISTIN BAYBARS

Talking with Kristin – an 80-year-old toy shop owner in North London – is a lesson in true values and authenticity. Above all she is inspiring, she inspires you to start creating yourself, using your hands, but mainly she inspires you to change your way of thinking. Toys are used as a medium to reveal Kristin and her values, which allow her world to exist. A little journey, escaping from reality but at the same time returning to what really matters…

Running time: 9 min 3 sec

Year of production: 2012

Watch now

*   *   *

This little place in gospel oak - a film about kristin baybars

Kentish Towner – Kristin Baybars’ ‘Little Place in Gospel Oak’

Filmmaker Alexander Osman has made a short docudrama that captures some of the unique atmosphere of her shop, with a rare cameo role from the softly spoken 80-year-old Kristin herself…

Running Time: 6 minutes 9 sec

Year of production: 2014

Watch now

*   *   *

Watching A Pathway of Crumbs was a rather odd experience for me. You see, I have been inside Kristin’s shop and it brought home to me, yet again, the fact that looking at things on-screen is no substitute for real-life experience. I can’t describe Kristin or her shop adequately in words. I can only urge dolls’ house enthusiasts and lovers of finely made, intelligent, thought-about, toys to make the journey to Gospel Oak and experience the wonders of Kristin’s shop for themselves.

Do check the shop opening times before you go. Much to my astonishment, I found that Kristin Baybars now has a page on Facebook, where there are updates on what is going on and contact details.

For those of you who are not Facebook fans (and I have to admit that I am not a happy Facebook user):

Address: 

Kristin Baybars

7 Mansfield Road,

Gospel Oak,

London

NW3 2JD

Phone: (UK code 44) 20 7267 0934

kristin baybars map and link to google page


book cover - the dolls' house book - pauline flick - 1973

The Dolls’ House Book – 126 pages
Author: Pauline Flick
Published by Collins – 1973
ISBN – 0001921568

Having been (possibly) unfair to the 1970s in the previous post, I thought I had better try to redress the balance and mention something that I do like from the 1970s.

Having said that: I didn’t know about this book in the 1970s; I bought it in a library sale in the early 1990s.

[And if you ever wonder why there are so many ex-library copies of books on eBay – the libraries in the UK started selling their books and downsizing quite a while ago now. Our small local library is about to close soon and then it will be goodbye to real books and we will only be able to get digital editions. People without computers, or no internet connection at all, (and there are still quite a few of these) are going to suffer.]

But back to the book: it is a modestly sized and I bought it because I liked the various illustrations of the window pelmets that are used above the section headings.

the dolls' house book - pauline flick - 1973 - pelmet illustration

I very nearly didn’t buy it because there is a section devoted to building a dolls’ house from a cardboard box.

the dolls' house book - pauline flick - 1973 - make your own dolls' house

But when I started reading it I was pleased that I had succumbed to the lure of the pelmets and the suggestion that you could build an Australian dolls’ house.

the dolls' house book - pauline flick - 1973 - australian house illustration

The book is clearly written with a juvenile audience in mind:

Grown-up collectors are always on the look out for old dolls’ house furniture…

but it is far from childish in its approach and, in a quiet sort of way, contains a great deal of historical information.

the dolls' house book - pauline flick - 1973 - cardboard chairs from the 1930s

It is divided into three main sections:

The History of Dolls’ Houses – I find this part fascinating as it is full of details that interest me and it is where I first learned of ‘The Girls’ Own Toymaker and Book of Recreation’ (published 1860 and now available on Google Books)

Making Your Own Dolls’ House – this contains a (sensible, if you ask me) description of making a robust dolls’ house from a cardboard box and suggestions of different types of styles of house that you might like to make, with pictures of the differing architectural styles of houses to be found in various British regions.

the dolls' house book - pauline flick - 1973 - timber framed suffolk house

Furnishing Your Dolls’ House – this is a very short section, but it ends with the wise words: “If you’re like me, once you begin collecting you’ll go on and on.”

*** *** ***

Re-reading the final section just now, in particular where the author describes cutting the head off a plastic deer in order to make a stuffed head to hang in her dolls’ house, I was reminded of something that I think might be of interest to someone reading this.

Jane Harrop (her website is here) provided instructions for making a hobby horse, using the head of a plastic toy horse for The DollsHouse and Miniature Scene Magazine (the article is here)

jane harrop - hobby horse

This is part of a series of ‘How To’ published by the magazine and made freely available by them on-line.

Not all the projects mentioned in the ‘How To’ section have detailed instructions, but there are lots of ideas, even when the instructions are non-existent or a bit sketchy.

*** *** ***

Finally, I have had a look and there is next to no information available on-line about Pauline Flick. This is a great shame as I am certain that she influenced the development of dolls’ house books and collecting in the UK.

The best I can do to redress this lack of recognition is to reproduce the biographic details from the back flap of the jacket ‘The Dolls’ House Book’ here.

the dolls' house book - pauline flick - 1973 - biographic details

While I was searching for information on-line I did come across a scanned copy of this book here.

I am not an expert of UK copyright law, but I am reasonably certain that it must still be in copyright in the UK.

Following Project Gutenberg’s reasoning on the matter of book copyright, it would therefore be an infringement of copyright to download this book to your computer.

Just looking at it on a computer screen, however, appears to be another matter entirely.

If you do decide to read it on-line you will be time travelling, so be prepared – there is only one colour photograph.

the dolls' house book - pauline flick - 1973 - frontispiece

This does not stop it being one of my favourite books about dolls’ houses.


spear's project cards - build your own dolls' house - 1970

SIZE – just over 6 x 4 inches

At the moment I am stuck, work-wise, in the 1970s.

Fortunately, the end is in sight for this particular project. I am saying fortunately because, although I am certain there must have been worse times to have lived through, there are all sorts of things that annoyed me in the 1970s that still annoy me today.

These project cards, which were published in the UK by J W Spear  are (in my memory at least) typical of the time: the strong, clashing colours, the determination to make something out of nothing, the way that it necessary to have a plywood base for a wobbly cardboard box house, the utterly unreasonable certainty that it is a little girl who will be making her own dolls’ house and that no little boy could be in the least interested.

While I am shuddering at my memories, I hope you will enjoy looking at the cards and marvelling at how things were.

If I think of these cards as an ancient historical artifact, I can almost persuade myself that they are no longer capable of annoying me intensely. Almost, but not quite…

Would anyone, these days, I wonder, suggest cutting off the end of an egg box to make a sofa?

If they did, I hope that at least they would try to disguise the essential egg boxyness of the finished article.

Paint? Beads for legs? Something, anything to make it more like a sofa and less like the end of an egg box…

No wonder I make every effort to avoid ‘How to Make’ books.

Kits? (continued)

triang banner, showing various toys

Many thanks to everyone who voted in the poll at the end of the previous post.

I was a slightly surprised that it was the Triang box which gained the most votes: I thought it would be the wrong era for most people.

There is an interesting and informative article about The Lines Brothers (Triang Toy) Company on Bethnal Green Museum of Childhood’s site and the Brighton Toy and Model Museum have a selection of catalogue pictures of Triang dolls’ houses in the index pages of their website  but, if you would like to see some actual Triang dolls’ houses and get a real feel for what they were like, I recommend visiting Shed on the Pond’s blog, which is full of fascinating details and also documents some remarkably patient restoration work.lines's brother's dolls' house - Brighton Museum


***   ***   ***

Now for the boxes: I have split them up into the types of card / paper that I used. Directions for making them up are in the previous post.

doll house cardboard boxes - 7 different ones

I have made a note of the materials that I used as they affect the end result. I am not suggesting that you need to use the same materials – and you could well know of better alternatives.

Just click on a link to open the pdf. You shouldn’t need to save the pdf to your computer, you should be able to print from the screen.

Measurements for the boxes are length x width x height

Triang Toy box
Size: 1″ x 1″ x 1″  –  2.5 x 2.5 x 2.5 cm approx

Triang occupies an important place in the history of British toy making and when I invented this box I took liberties with their logo: the slightly smudgy label comes from a picture that I found on the side of one of their toy lorries.

Eastman’s Perfume
Size: 1″ x 1″ x 1″  –  2.5 x 2.5 x 2.5 cm approx

I used a ‘craft’ paper sold in my local craft shop for both of these boxes. The paper cracks when scored and creased; it goes soggy when dampened. (When I painted the Triang Box with cold tea, in order to age it and show up the cracks and wrinkles, the box nearly fell apart – but the printing did not run !) I have only had the paper for about a year and it is already yellowing at the edges. For most practical purposes it useless BUT it does make a very good bashed box. I would tell you what it is, but I threw the label away, vowing never to buy any more, and now my local craft shop has closed down so I can’t ask them.

When the boxes were assembled, I added white paper ‘tape’ (this was a thin strip of paper glued in place) to seal the boxes and then cut through this at the top end to add a touch more realism.

***

Bunting’s Babywear
Size: 1″ x 1″ x 1″  –  2.5 x 2.5 x 2.5 cm approx

I used 140 gsm card for this – it too came from my recently closed down local craft shop.  I can’t find another supplier either locally, or on-line, who has it, which is a nuisance as this is exceeding useful, reliable, smooth card. (Great Expressions, Birmingham address – are either the manufacturers or the packager / suppliers.)

***

Worth et Cie (British) corsets
Size: 1.5″ x 1″ x 1/2″  – 3.25 x 2.5 x 1.25 cm approx

Peppermint liqueur (French)
Size -this was made to fit the label, it is an odd size

I used 200 gsm Daler Rowney Heavyweight ‘paper’ for these (see previous post for details)

***

Blank Box – for postage or decorating
Size: 1″ x 1″ x 1/2″  –  2.5 x 2.5 x 1.25 cm approx

I use 280 gsm Kraft card from Amazon, where it is available in A4 and A5 sheets, when I make these (see previous post for details)

***

Lamp box – large (German)
Size: 1.5″ x 1″ x 1.5″  –  3.75 x 2.5 x 3.75 cm approx

miniature boxes for a german lamp

Lamp box – one lamp size (German)
Size: 1″ x 1″ x 1.5″  –  2.5 x 2.5 x 3.75 cm approx
(I found this file after I published the previous post and I think it is a useful size)

I used handkerchief box card for these lamp boxes. Most card (in the UK) that is used to package food or things like paper handkerchiefs is high quality. Usually it cuts cleanly and does not break up when scored and creased. If you are patient and peel the glossy printed surface off the cardboard backing, you can then print on the smooth side of the card and have a box with an interestingly textured interior.

'peeling' a handkerchief box toget cardboard

When the box was assembled, I added brown paper ‘tape’ (this was a thin strip of paper glued in place) to seal the box and then cut through this at the top end to add a touch more realism.

***

Red Dog – headphones
Size: 1″ x 1″ x 1″  –  2.5 x 2.5 x 2.5 cm approx

I used Bristol board for the Red Dog box – more specifically, Goldline 220 gsm Bristol Board. This is relatively expensive, but it does have a very white, very smooth surface. It takes ink-jet printer ink beautifully and it did not crack or break up when I scored and folded it. It has a very dense structure and I find it rather difficult to work with, but if you need a smooth, clean, slightly shiny modern look this could be a good choice.

NB There are different makes and types of  Bristol Board, with different finishes.

***   ***   ***

While I was hunting around on the computer, I found the files for these boxes:

dolls' house christmas boxes -open house miniatures 2017

I suppose I should save them for Christmas, but they might come in useful before then and so…

Christmas Boxes:
Size (all): 1″ x 1″ x 1/2″  –  2.5 x 2.5 x 1.25 cm approx

 Greetings – snow scene

 Santa and Sleigh – Bright colours and very modern looking

 Father Christmas and reindeer – faces

 Season’s Greetings – red bells

 Christmas decorations – fir branches and glass balls

When I use these for small gifts I sometimes close them with a small Christmas sticker or use a ribbon tie and a large label, but they can be fun (with a mini label) under a miniature Christmas tree too.

The examples above were made from Hahnemuhle Nostalgie 190 gsm (A4) sketch block paper. This came from an art shop and I can’t see anything identical on-line. Jackson’s Art  have A3 to A1 blocks that looks similar.

This paper / card is ‘natural’ white and not pure white. It is smooth and easy to work with, but the ink tends to ‘bleed’ a little bit and truly crisp detail disappears.

(It doesn’t help the image quality that I turned this photo into a jpeg in order to save WordPress file space.)

miniature box detail - open house miniatures 2017

One of these days I am going to stop doing six things at once 🙂 In the meantime, I will see if I can find the small sheets of Christmas paper that I made with these designs. If I do find them, I will put them on the Printables page – which I think is looking forlorn and neglected at the moment.

[Disclaimer: I don’t host advertisements on this blog. If you see any, they have been put here by WordPress who need to fund their blog hosting. I could pay WordPress to have the advertisements removed, but I am either too mean to do this, or I need to buy paper, card, paint, new brushes, scissors, varnish, glue or something else instead.]